Runner’s knee- The ultimate guide


Runner’s knee- The ultimate guide
(Disclaimer: This article is for general informational purposes only and does not constitute the practice of medicine or other professional health care services, including the giving of medical advice. Please seek the assistance of your healthcare professionals for any such condition.)
Do your children laugh at the strange sounds your knees make when you climb the stairs or get up from the coach? These crunching noises, reminiscent of a Styrofoam coffee cup, might be an indication that you are developing what many runners suffer from: Patella Femoral pain or Chondromalacia. Or for a more pronounceable diagnosis-Runner’s knee.
Runner’s knee is a condition where the cartilage under the knee cap becomes irritated and inflamed. It is painful and can be accompanied with clicking or grinding noises. The most annoying symptom of Runner’s knee is that the pain moves around the knee and it hard to pin point.
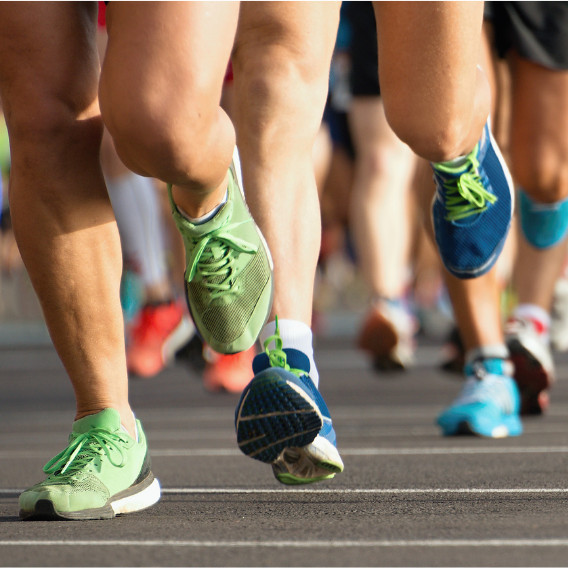
Any activity that constantly stresses the knee joint can cause Patella Femoral pain.
From hiking to skiing to cycling and playing soccer. It is however very common in runners and this is why we at Marathon Grit have decided to equip you with all the knee knowledge you need!
WHAT CAUSES RUNNER’S KNEE?
Runner’s knee is more common in women because hip alignment anatomy in females places more stress on the joint than in males. Runner’s knee is also seen more often in overweight people. There are many factors that can lead to developing Runner’s knee. These include, but are not limited to:
Worn out trainers
Supination or pronation of the floot (flat feet or high arches)
Imbalance from the VMO (Vastus medialis obliquus)
Tight hamstrings
Overuse
Trauma or misalignment of the kneecap
Flat feet
Tight Achilles tendons
Arthritis
WHAT DOES RUNNER’S KNEE FEEL LIKE?
Runner’s knee is a dull thudding ache that is localized to the knee from the get go. It can hurt around or behind the kneecap, or patella, especially where it meets the lower part of the thighbone or femur. The pain is usually worse when you go up or down a staircase, when you squat or when you do lunges. Sometimes the pain is more acute on the outside of the knee and this may indicate iliotibial band syndrome or ITB as us runner’s like to call it.
LISTEN TO YOUR BODY FOR FEEDBACK
Sports Physician Kevin Elder says that simple changes such as reconsidering the surface you run on can have an impact on your Runner’s knee. He recommends listening to your body and taking note of when the pain sets in. Are you feeling it when running up a hill? Is it worse on a technical trail run or on a flat road run? Do you experience more pain when you run on the beach or do a stair session? Taking note of the pain can help to treat the cause of the symptoms and when you have recovered, you may be able to avoid the injury when you return to chasing PB’s.

HOW RUNNER’S KNEE IS TREATED
Treatment for Runner’s knee should be sought form your physical therapist (and if needed medical intervention). Depending on your age, activity level and the severity of your injury your PT will recommend a course of action. Most resources agree that rest is required to treat an injury caused by overuse.

Use the RICE method: Rest, Ice, Compression and Elevation. This should help to settle your pain.
Your Physical therapist might choose to treat you with some of the following modalities:
Dry needling of surrounding muscle groups, shockwave therapy, tapping and lots of strengthening exercises if you have some muscle imbalance.
If your symptoms are not too severe, you might benefit from keeping you muscles loose.
4 Stretches you can do to help your knee:
Do NOT do these if they aggravate your knee- seek advice for what suits your individual needs.
If you have been diagnosed with Runner’s knee the following 4 stretches can assist your rehab and get you back to pounding pavements:
1. Standing hamstring stretch: Use a small stool for this stretch. Put you heel on the stool and keep your knee locked. Lean forward until you feel a mild stretch in your hamstring. Bend from the hip and do not over extend your lower back. Hold the stretch for 15 to 30 seconds. Repeat 3 times.
2. Quad stretch: Stand next to a wall with you injured knee on the outside. Holding onto the wall for balance, grab the ankle of the injured leg and pull your heel towards your bottom. Don’t arch or twist your back. Keep your knees together. Hold this stretch for 15 to 30 seconds.
3. Calf stretch: Facing a wall, put your hands against the wall as if you want to push it away from you. Put one leg forward and the other back with the heel on the floor. Turn your back foot slightly inward. Lean in and you will feel a stretch in your calf. Hold for 15 to 30 seconds. Repeat 3 times. Make sure to swap legs.
4. ITB stretch: Cross your legs and lean in the opposite direction from the front leg. Reach the arm on the side of the back leg over your head. Hold this position for 15 to 30 seconds. Return to the starting position. Repeat 3 times. Remember to stretch both your legs.
8 Strengthening Exercises for Runner’s knee:
1. Side-lying leg lift: Lie down on your uninjured side, flex your quad muscles on your top leg and lift that leg 8 to 10 inches away from the other leg. Keep the leg straight and lower slowly. Do 3 sets of 10.
2. Quad sets: Sit down on the floor with your injured leg straight and your other leg bent. Now, press the back of the knee of your injured leg against the floor by tightening your quad. Hold for 10 seconds. Relax. Do 3 sets of 10.
3. Straight leg raise: Lie on your back with your legs straight out in front of you. Bend the knee on your uninjured side and place the foot flat on the floor. Tighten the quad of other leg and lift it about 8 inches off the floor. Keep the quad flexed. Slowly lower your leg back down to the floor. Do 3 sets of 10.
4. Step-up: Find a block of wood or a small step to do this next one with. Stand with the foot of your injured leg on it. Keep your other foot flat on the floor. Shift your weight onto your injured leg (on the step or block) straighten your knee as the other leg comes off the floor. Lower your leg back to the floor slowly. Do 3 sets of 10.
5. Wall squat with a ball: Place your back, shoulders, and head against a wall and look straight ahead. Place your feet shoulder width apart and about 2 feet away from the wall. Use a soccer or basketball-sized ball for this one and put it behind your back. Keeping your back straight, gently squat down to a 45-degree angle. Hold this position for 10 seconds and then slowly slide back up the wall. Repeat 10 times. Build up to 3 sets of 10.
6. Knee stabilization: Use a rubber band for this one. Wrap it around the ankle of the uninjured leg. Wrap a piece of elastic tubing around the ankle of the uninjured leg. Tie a knot in the other end of the tubing and close it in a door.
Now face the door standing and bend your knee slightly, keeping your thigh muscles tight. While maintaining this position, move the leg with the tubing straight back behind you. Do 3 sets of 10.
Turn 90 degrees so the leg without tubing is closest to the door. Move the leg with tubing away from your body. Do 3 sets of 10.
Turn 90 degrees again so your back is to the door. Move the leg with tubing straight out in front of you. Do 3 sets of 10.
Turn your body 90 degrees again so the leg with tubing is closest to the door. Move the leg with tubing across your body. Do 3 sets of 10.
Caroline’s Top Tip: To make this exercise harder you can use a balance pad to stand on. To make it easier hold on to a chair for support.
7. Resisted terminal knee extension: Use the rubber band again. Make a loop and tie the ends off. Close both knots in a door. Step into the loop so the tubing is around the back of your injured leg. Lift the other foot off the ground. Hold onto a chair for balance, if needed. Bend the knee on the leg with tubing about 45 degrees. Slowly straighten your leg, keeping your quad tight as you do this. Do this 10 times. Do 3 sets.
8. Clam exercise: Lie on your uninured side with your hips and knees bent and feet together. Slowly raise your top leg toward the ceiling while keeping your heels touching each other. Hold for 2 seconds and lower slowly. Do 3 sets of 10 repetitions.
Sometimes you may need additional medical help. Your physician might have to prescribe anti-inflammatories. But always start with more conventional methods first.
THE GOOD NEWS
The good news is that Runner’s knee is treatable and does not mean the end of your running days. The better news is that most non-invasive methods like the physical therapy we mention here is successful. Give your body the time it needs to heal and you will reap the running benefits when you return to doing what you enjoy most.
REFERENCES:
Share This Article!
FREE ECourse
The Training Blueprint
Your guide on how to achieve
your goals with expert advice on
how to train, injury prevention
tips, and mindset.
Recent PAbout the Authorosts

HI Gritty Runners, I’m Caroline!
I am SO excited that you’re here! I’m super passionate about helping people to run far and having lots of fun along the way. I specialize in teaching others how to have a running body and a running mind to help them go the distance. My mission is to build your resilience so that you can be marathon ready. I pool together my knowledge from sport science, physical therapy and wellness coaching to keep you running stronger for longer.
Recent Posts
WHAT WOULD YOU LIKE TO DO?
POPULAR ARTICLES
Copyright © Marathon Grit. All Rights Reserved.


